Followers

Thursday, 4 April 2013

Happy Easter

Well as I write this I'm looking at the snow falling and deciding that today is not the day to start on the gardening! 
Instead I've finished off my latest journal quilt and over the Easter weekend I had fun playing with some Japanese wrapped patchwork blocks - as well as machine work I like having hand stitched projects that I can work on in front of the TV.

April journal quilt

The verse for my April quilt was "April brings the primrose sweet, scatters daisies at our feet" - well not yet but it's early in the month so let's hope.

The background is a piece of self dyed cotton which I machine quilted to add texture and to suggest grass.
Not the best of photos but you get the idea! I decided to try out a different edging technique to finish of the quilt - I marked the edges using a removable pen and then worked a zigzag stitch all around - I made it fairly narrow and also shorter - but not as tight as satin stitch. I then used my cording foot to apply a toning narrow silky ribbon on top of the first line of stitching before trimming the piece to size.

The flowers were from a piece left over from a previous piece - I ironed them onto bondaweb and then trimmed around them. I originally planned to iron them down and then stitch around them but after cutting them out - and before removing the backing paper I left them on the base - after a a couple of day i noticed that the petals were starting to curl up and I decided I liked how this added a three-dimensional quality to the mini-quilt. I therefore left the backing on and then stitched them on using a toning thread and a small cross stitch at the centre of each flower.

Japanese wrapped patchwork bag

In some ways this is a bit of a cheat! I had made a whole series of these hexagonal blocks a while ago and sold some as coasters. I then saw a picture of a bag made using paper pieced hexagons and thought about how I could do something similar with the hexagons i had made.

I stitched them together in three rows of 6 and then joined these rows together. I then stitched it into a tube and then formed a base by stitching the sides of the hexagons together - think star. I then used one more hexagon block to form a tab. I was lucky enough to find some lovely multi-coloured cord in my favourite haberdashery shop which had the same colours in it as the fabrics i had used and made a chunky plait to make the strap and to make a button loop to form the fastening. I'm really pleased with it and the colours make it very springlike and cheerful.

This then inspired me to try out another block - but that's another blog!


Saturday, 16 March 2013

March brings breezes

Well I have finished my March Journal quilt and here it is.

March brings breezes loud and shrill
Stirs the dancing daffodil.


As I showed in my last blog the background was needle felted using my embellisher machine and I then added detail by using some (very) simple embroidery and appliqué to put in a few more distinct daffodils at the front. I wanted to present it as if it were a painting and so used some fabric to notonly make a backing but to make a frame.

I used a wool pre-felt as the backing and then used a mixture of silk and wool tops together with some silky rayon embroidery thread (the light brown parts) and used some small pieces of dark brown cord for the trees.


Detail showing the "daffodils"

This shows the different texture provided by the use of the different fibres.


So now it's on to thinking about my April journal quilt and also completing this larger and more traditional quilt which is another one using fabrics I dyed last summer.

Here is it in piece form - a bit of a jigsaw puzzle! I then pinned it onto the sheet I use as a design well so that I wouldn't get it muddled it up again. 


Sunday, 24 February 2013

Catching up part two

Well with this post I will be fully up to date with my blog.
Last year I put together a quilt top using fabrics I dyed using a colour exchange technique at a masterclass I attended at the Festival of Quilts last year. I used the cutting Plan in Barbara Chainey's book, Fast quilts from fat quarters and also based it on one of the designs in that book although I adapted it a little. One of the big advantages of the dyeing technique used is that you end up with a selection of fabrics that all work together as the two main colours are used together in various different combinations of dye strength giving the various shades.

This week I finally managed to get it quilted and on a cold February afternoon it was quite cosy to sit with it over my lap while I hemmed down the binding. So it's finished but so far it is in need of a name - the things it brings to my mind are mosaics or old tiled floors and it also reminds me of Klimt with the patterns and the swirls of the quilting.

The finished quilt is about 36 x 44 inches.


Journal quilt for March
Getting ahead of myself but it was a case of getting the idea and wanting to try it out. 

The verse is
March brings breezes loud and shrill, stirs the dancing daffodil

I have tried out a very different, for me, approach to this - I looked at various images and decided to to make the background by using my embellisher machine to apply a selection of fibres - wool and silk tops and embroidery threads to create this - it gives quite a painterly effect and i want to add detail and texture with embroidery.


 This is a close up of part of the background showing the contrast in texture from the use of different fibres.

This is the foot - the fingerguard is important as the needles (5 in this machine) are not only sharp but barbed in order to interlock the fibres and needle felt them together.

Before and after shots , the first shows the fibres after they have been placed on the background and the second how they look after needle felting
The completed background.

Saturday, 23 February 2013

Journal Quilts 2013

I have been a member of the Contemporary Quilters group - linked to the Quilter's Guild for a few years and each year have thought about and then decided against, taking part in their annual Journal Quilt challenge. This is set each year and consists of agreeing to complete 12 "mini-quilts" linked by common features such as size/colour/theme. 

This year I decided to give it a try after reading posts on the CG website which were encouraging people to have a go and which made the important (for me) point that these quilts could be as complex- or as simple as wished. I also saw it is a good way of trying out different techniques and playing - sorry experimenting. the format this year is 8 x 12 inches, horizontal orientation with a self chosen theme which had to be explored across the year. I have chosen the poem The months" by Sara Coleridge - it's the one which begins 
"January brings the snow, makes our toes and fingers glow"

this gives me a clear theme for each month and also ones which lend themselves to being interpreted in range of ways - and if i do manage to complete the challenge I can use the photos to make an individual calendar for 2014. I've completed the first two months so here they are.

January brings the snow, makes our toes and fingers glow.


This is the whole piece - the background is a piece of self-dyed silk - indigo dye. 

Showing the quilting - swirls in the sky and the lines from the poem. I also added beads and used fabrics to try and get the feeling of sun glinting on snow giving it that sparkle you see on frosty mornings.

February brings the rain, thaws the frozen lake again.


Back to one of my favourite techniques - layered up and stitched organza - I first stitched the organza and then layered it up and quilted in short slanting lines with a grey metallic thread. Parts were cut away around the lettering which was also gone over in a gold pen. I used a fabric soldering iron to make holes in the organza and then added beads to give more texture and suggest rain splashing into water.
Detail to show the detail more clearly.

So far I'm really enjoying this challenge - as I said I'm treating it as a chance to experiment without making the commitment of a larger piece.
Next challenge - dancing daffodils for the March piece. Watch this space.


Friday, 22 February 2013

Very important project

I had a very special project to complete this year and the one which I was both very proud to have been asked to complete but also very anxious about as it came with  more than a bit of pressure.
The project? To make my daughter's wedding dress - hence the pride but also the pressure!

We bought the pattern back in October and I got the fabric after Christmas and ended up with about 5 weeks to complete the dress - lots of visits for fitting and lots of tacking, sewing and tacking again. One thing I discovered I did not like was sewing lace. My daughter was very patient with me especially over the sleeves which took me a while to get right and so until her final fitting she had sleeves in a cotton fabric.

I felt incredibly proud that she trusted me with this - I don't think she could have paid me a bigger compliment and was thrilled (and tearful) when at the final fitting (for the straps) she said it was perfect and just what she wanted. Not content with making the dress I also made her garter and bags for her and her bridesmaids.

I was thrilled when I saw her walk down the aisle - but I do not want to make any more wedding dresses!


 Busy sewing


Back view - note the beautiful sleeves!

 It's those sleeves again.
 The bridal bag - I made this and the bridesmaids ones in the same fabric and lace as the dress - the bridesmaids bags were the same design but without the ribbon roses and varied in size.
 The garter - cream cotton lace and blue ribbon
Proud Mother of the Bride - with my two gorgeous grandsons

The newly-weds.

Thursday, 21 February 2013

Altar Frontal

This was another big (literally) project I took on and one which had a completion date which was set in stone once I had started.
During the Easter season I noticed the poor condition of the Gold Altar frontal - it was badly water stained and the silk was starting to rot in several places. I couldn't get it out of my mind and so in September I offered to make a new one. I started at half-term which meant I had a date of the 24th December to get it completed. My parish church has been through a difficult time lately and so I wanted this to be a symbol of both the history of the Church but also of the community looking forward. I therefore decided to base it on the design of the old frontal but with a modern twist. I asked the congregation to donate scraps of red fabric - any weight or type to use for the two red inserts which I planned to make using Lisa Walton's Crystallisation technique. This also echoed some of the mosaic work in the church. In addition I carefully took the Pelican motif off the old frontal as I wanted to re-use it. This motif is known as "the Pelican in her piety" - it was a belief that the pelican fed her chicks with her blood and thus it became a symbol of the sacrifice of Christ on the cross.

I also took off the red inserts from the original frontal - and as this fabric was still in good condition I carefully washed it for re-use.

The fabric was a heavyweight furnishing fabric which i was able to source from my local market.

I quilted the red panels once they were completed and wanted to quilt the bottom of the frontal as this would give it more weight and help it to hang.I quilted this with a flowing leaves design which was based again on the mosaic panels below the windows at the East end of the church of olive branches.

The most challenging aspect was the measuring and trying to press it at home due to it's size.

 This was it's first appearance for Christ the King - I then took it home for some final adjustments

 Detail of the quilting at the bottom
Detail of the patchwork - wrong way round.

Catch up number 1

Well it has been a long time since I last posted but my excuse is that I have been very busy so will now catch up in a few posts.
I was very busy in the run up to Christmas firstly with two local Craft Fairs - when I said "yes" to the first of these I had not really thought through the fact that this meant I had to get busy making things to sell! It was a real learning curve for me - making several versions of the same things, pricing, display etc as well as just approaching the fairs with the approach that what I made was worth buying! I made a variety of items - some Christmas themed as well as more general "gift" items. All in all I took £50 at the first (on a very wet December day and with a poorly placed staff and £110 on the second  - but also got some really positive feedback and ideas of what things sell, what price points attract people and also how to sell. It was interesting to see the make up of people buying things as well - some (mainly older) wanting to get something unique and handmade but also for younger people (20-30) who saw buying gifts in this way as a way of supporting the local economy and as "action" against the big retailers e.g. Amazon.

I will definitely do this again and have a better idea now of what to sell. Here are photos of some of the things I made.
These sold much better at one fair than the other - next time I will put suitable Tea-lights inside

 Very popular - and quick to make. Next time I will use a wider variety of fabrics and put lavender in some.

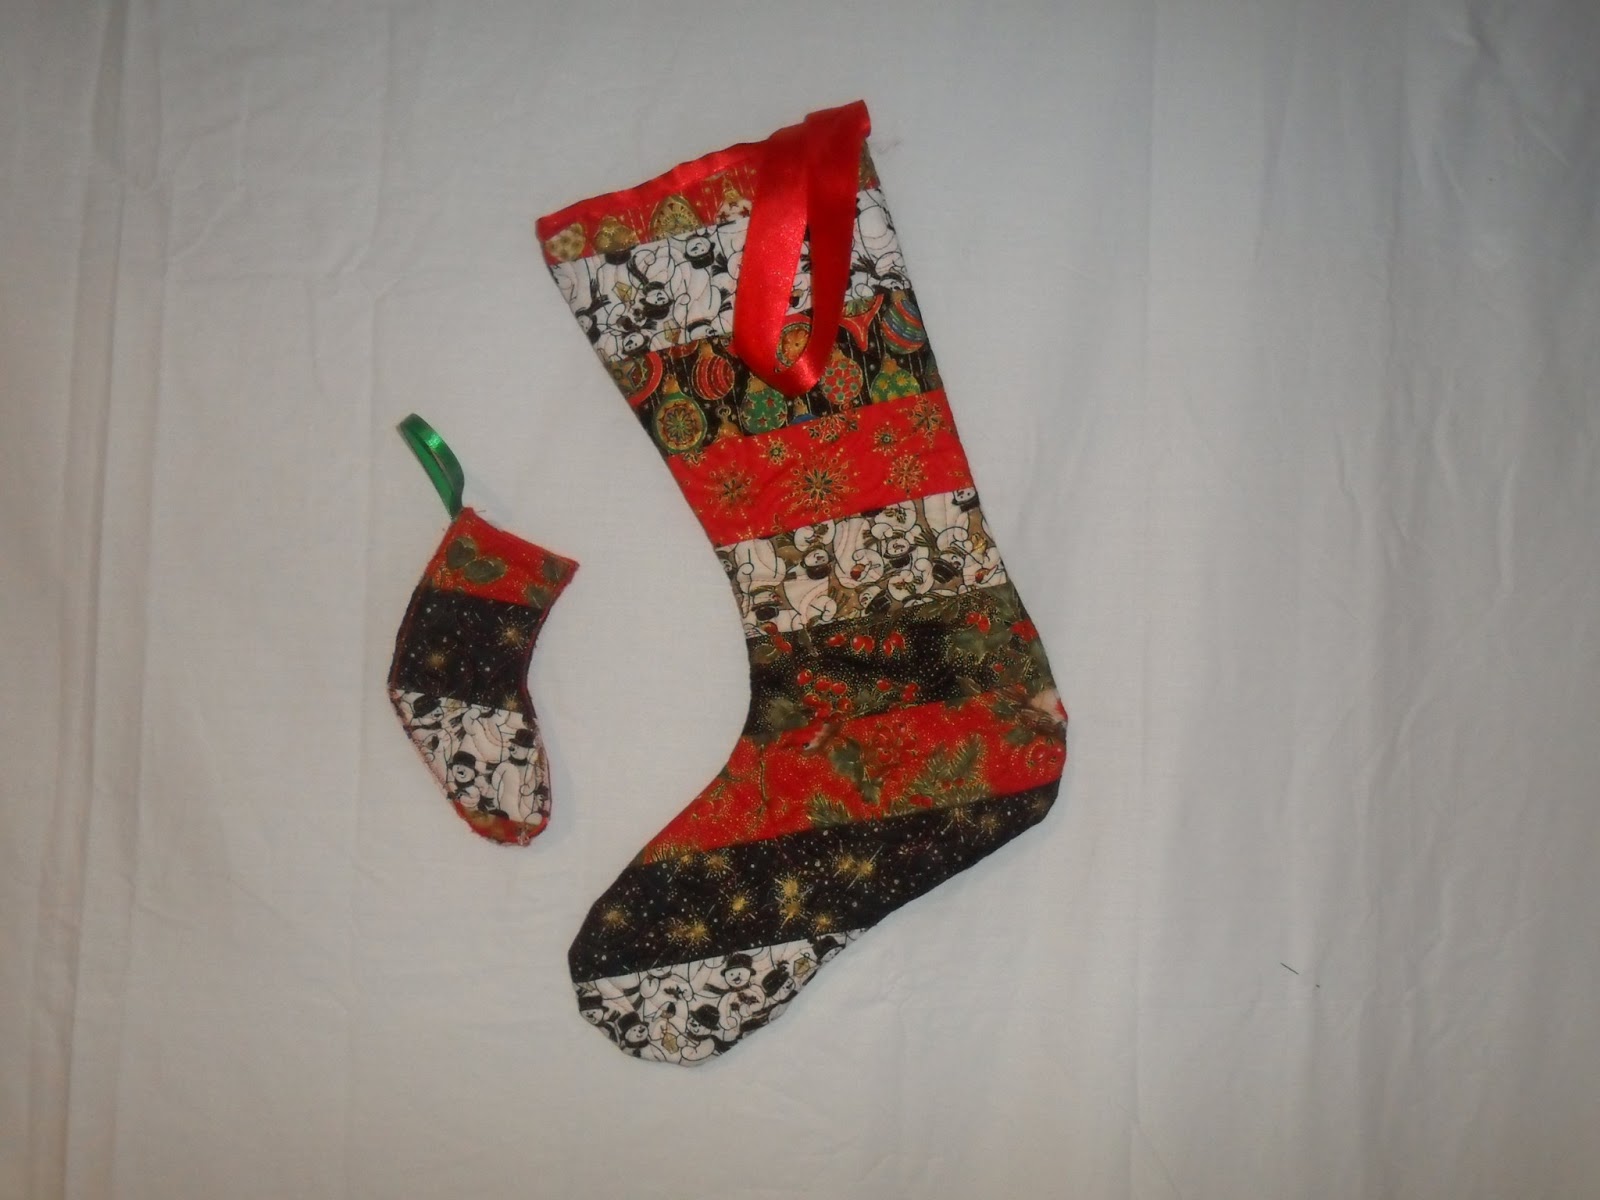
 These sold well - I put candy canes in the small ones and they were popular for tree decorations and also for giving money gifts.
 A couple of the cushions I made
 Hand-dyed silk scarves - these did not sell well - maybe it was the time of year - too light and floaty?
A quick to make and fun item

Tuesday, 18 September 2012

E17 Art Trail

Well the Art Trail is over for another year but it has been an exciting, as well as a tiring couple of weekends - but I must admit to looking forward to doing it all again next year!

I took part in a group show with a number of other designers, the main other ones being Harriet Hammel, soft scupltures, and Elizabeth Pell, paintings. Although I didn't sell anything I got a lot of positive feedback about my work and in particular was invited to submit some work to another up-coming exhibition at "The Mill" , a local community base that hosts exhibitions as part of his work and also to take part in their Christmas Craft fair.

Back home, and back to the day job, my current projects are a small pieced quilt based on a design from Barbara Chainey's book Fast Quilts from Fat Quarters and some of the fabrics I dyed at the Festival of Quilts, and then a Gold Altar Frontal for my local church. - Oh and some items to sell at the Christmas Craft Fair. Should keep me busy!
And here are some pics.
Painting by Elizabeth Pell and the Right Reverend Mother by Harriet Hammell

My Autumn Glow quilt and another of Elizabeth's wonderful paintings

Two of my pieces in the foreground looking to the back of the church.
More of Harriet's amazing soft sculptures - the detail she puts into these is incredible.
L

Thursday, 23 August 2012

Kindle and Festival of Quilts

I've been wanting to make a kindle cover for some time and now I have finally managed to do it. I've used a whole range of appliqué techniques and what seems to be one of  my "trademark"  fabrics, organza. There are four layers of appliqué in the finished piece - layered and cut into organza, Lutrador which I coloured with inktense pencils, stitched on to black cotton and cut away using a fabric soldering iron and then some of the pieces which were cut away were stitched back on, polyester dupion, lame and sparkly tulle which was over-stitched and then distressed using a heat gun, and finally icicles which were made from organza laid over lame.

Lots of layers, lots of stitching, and lots of texture! To line it I used a piece of self dyed shibori fabric which I dyed using woad which gives a lovely pastel blue.


I had a great time at the Festival of Quilts last week and especially enjoyed the three day masterclass taught by Jo Lovelock in which she taught a whole range of ways of dyeing fabric. It was quite hard work at times with lots of fabric which needed to be rinsed by hand and also some methods which involved having to agitate buckets of fabric for up to 10 minutes at a time. Amongst the most useful techniques taught were ones which enabled us to produce pieces of fabrics which shared gradations of colour within a family or with gradations of shades and colours. We were encouraged to mix colours and over dye fabrics and shown how to get texture into our fabric and to think about how to place colours to get different effects. Now all i have to do is sew it! Watch this space - I don't think I'll be buying any fabric for quite a while.

Monday, 20 August 2012

Fuschias

In some of my previous posts I have included pictures of pots/candle holders I have made using organza, dissolvable film and stitch. For some time I had thought about using this technique to make some hanging flowers - specifically fuschias as I love their colours. I had a suitable stand but not the correct shape glass to use as a mould. However when shopping in Sainsbury's a few weeks ago I came across some tumblers which were the shape and size I had been looking for and so I was able to start work - though still unsure about exactly how I was going to make the flowers - especially the outer petals.

I used the normal technique for the inner petals but cut the film to a circular shape to get a more regular edge.  Once these were completed I cut a paper template for the outer petals and then again used  the same mould - but allowed for an overlap so I could fit them over the inner petals. This worked and I carefully moulded the petals so they had the curve I wanted. After beading them I secured the two layers together with beads and stitching and then made beaded loops to hang each flower.


I'm really pleased with how these have come out - think I will have to try some snowdrops next.

Tuesday, 7 August 2012

Catching up

Well one of the joys of being on holiday is that I can catch up both with friends and also with sewing!
In terms of catching up with friends I had a lovely day last week with my friend Shirley and finally delivered her birthday present - "Shirley's birthday bouquet"
Here are a couple of pictures - the background is made from part of a jelly roll - cream patterns with gold highlights which I quilted with a feather filler design and then appliquéd lilies made from raw silk.

I'm taking part in the E17 Art trail this year so as well as asking Shirley if I can borrow this piece back I thought I ought to make a couple of new pieces. I had a very bright jelly roll which I bought last year which I had been wanting to use for some time and was inspired by the hot week we had at the start of the summer holidays to make this piece "Feeling hot, hot, hot"

I think it is clear what I meant by it being bright! To make the centre section stand out more I used two layers of wadding for this section and quilted it with a "flame" design and then quilted the remainder with a closer stitched filler pattern.


My final piece of catching up has been with my City and Guilds - I made myself get on with making up samples (my least favourite part it has to be said) and completed module 8 so that's been sent off and I'm waiting for feedback on my accessory design - it has to be said that the opportunity to go shopping for materials at the FOQ next week was an incentive to get on with the design of that.